Hacky Spell Checking for Blog Posts
While writing another post for this blog, I came up with a dirty hack to quickly check the spelling and grammar of my text.
I use Helix as my text editor of choice, also when authoring blog posts. It does, however, come with a major shortcoming: no support for spell checking whatsoever! Or maybe it does support spell checking: you can configure custom language servers, which should allow me to use LTEX as an LSP interface to LanguageTool, a pretty decent spell and grammar checker. Jens Getreu wrote an article about it, among a couple other things.
But that’s too much work, and I’m very prone to yak shaving!
The actual hack
Set the contenteditable attribute on your content.
Now, your browser will check your content!
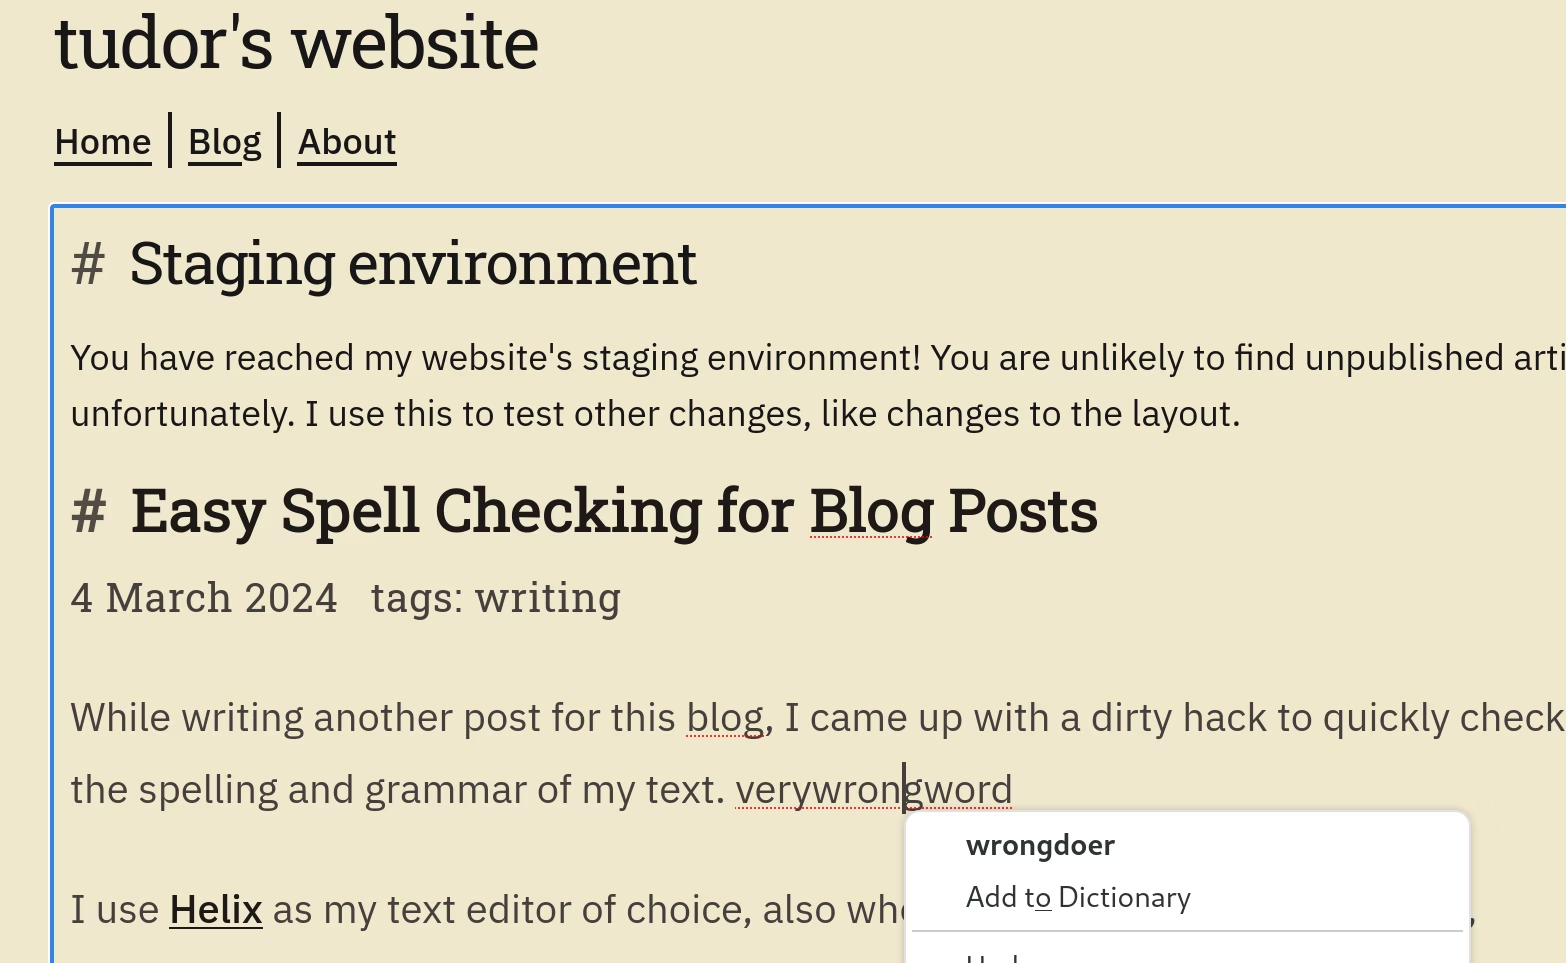
You can exploit this even further by installing extensions to alter the spell checking behaviour of your browser, such as the LanguageTool browser extension.
Time it took to set this up: 30 seconds.
How I use this
As you can see from the picture above, my website has a “staging mode”.
I can use a flag — which is descriptively called release —
to show content only when the website is in one of the two modes: staging and release.
To “enable” spell checking, I only had to change this line:
- <main class="p-2 text-lg">
+ <main class="p-2 text-lg" {{ if !release }}contenteditable{{ /if }}>
I gave myself a good pat on the back after discovering this!